We all know Recently Apple acquired Workflows, added some features, cleaned it up, and Voilà! – Siri Shortcuts. But I stumbled across a few articles that showed me an additional plethora of shortcuts that can be had in iOS using an additional method. That’s AssistiveTouch, which perfectly dovetails with Siri Shortcuts.
As you command Siri Shortcuts via your voice, you order AssistiveTouch to do your bidding with your fingers. It’s just that simple and I’ve found that it can perform several actions that I have found irksome to do.
You access AssistiveTouch in Settings>General>Accessibility. Scroll down a little and click on AssistiveTouch to turn it on.
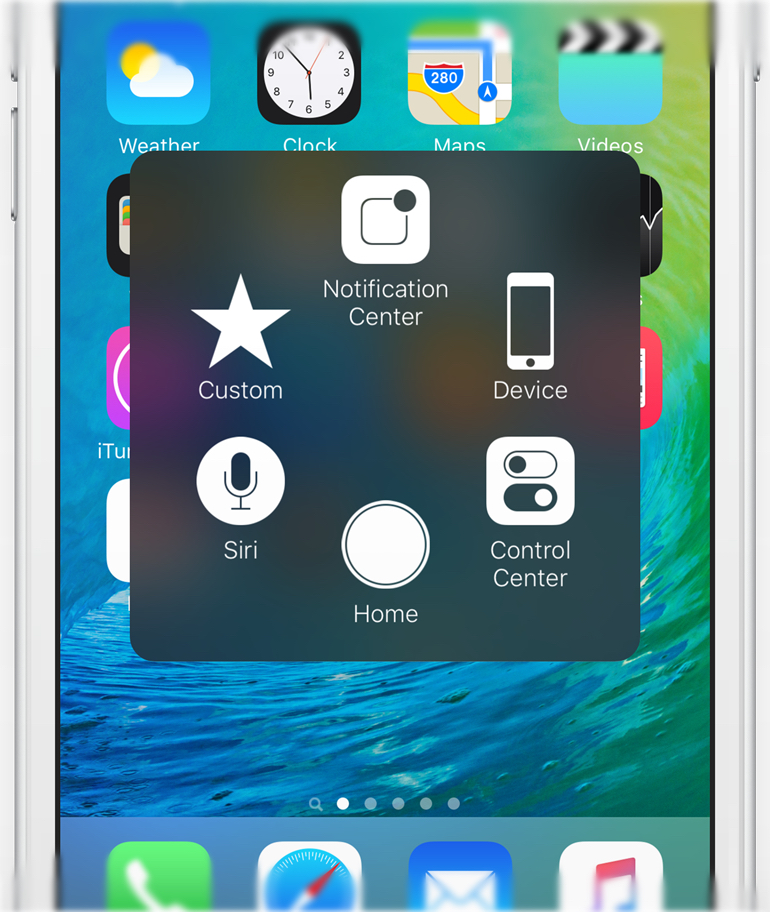
When you click on the bar, you’re presented with a base configuration of six commonly used actions. You can stay with the preset actions or personalize it to your needs. Click on the “Customize Top-Level Menu’ bar and you can work its magic.
The preset screen has six buttons. But you can either lessen the number or increase it. It’s accomplished by touching the ‘+’ or ‘-‘ buttons at the bottom of the screen.

To change a function, tap on its icon. This will present you with a screen with roughly two dozen functions to choose from that run the gamut of actions you might wish to execute regularly or find obnoxious to do. Choose the function(s) you desire, click Done, and it will replace the current functions in the box.
Among the selections are: Lock Screen, Mute, Pinch, 3D Touch, SOS, Analytics, Pay, and many others. And you’re not limited to Apple’s presets. You’re free to create your own. Again navigate to AssistiveTouch and click on Create New Gesture. You can create a series of taps or swipes and combine them into one gesture!

To navigate using AssistiveTouch, you will find a round button encased in a square. You can drag it to anywhere on the perimeter of your screen. In certain instances, I’ve found that with some apps it will move itself if it’s covering a button. Click on the button and your selections are presented.

Personally, I immediately replaced two of the boxes with functions I find a real pain – Restart and Undo.
To Restart the iPhone 8+, you must press the Volume Up button, then the Volume Down button, then press and hold the Power button until the Apple logo appears. With AssistiveTouch, I merely tap the Restart button and all of this is performed electronically. No more dexterous gymnastics.
Another pet peeve I have solved is Shake, which is iOS’s equivalent to ⌘-Z. Instead of shaking the iPhone to erase what I’ve just typed (and it normally only works about half of the time), all I need do now is push the Undo button and the offending passage is removed immediately. (Supposedly, Apple will incorporate this as a feature in iOS 13.)
Basically, I’ve used AssistiveTouch to replace any action that requires me to physically utilize the iPhone’s buttons. I’ve chosen screenshot, which captures your screen sans AssistiveTouch’s on screen box (and that’s how I captured some of my screenshots for this review).
You can set-up Custom Actions. Choose from: Single-Tap, Double-Tap, Long Press, and 3D Touch. For example, I have set 3D Touch to take me back to my Home Screen and Long Press to start Restart. As with choosing your gestures, you have a multitude of choices for your custom actions.

Using Siri Shortcuts and AssistiveTouch reminds me of a joke by Jay Leno. As he’s driving, the car in front of him keeps slowing down and speeding up. The result: the lead car gets through the yellow light and he’s stuck at the red light. He becomes aggravated and screams, “Who are you to waste 20 seconds of my life?”
I’m using both apps in most cases to accomplish something by touching one button instead of two or three. Definitely a first-world problem.
Yet if I can make accomplishing something as simple as me, I’m there. AssistiveTouch definitely saves me difficulty when I’m operating the iPhone’s physical buttons. But, to be honest, if I can accomplish something with a single touch …
Give it a bash.
©2019 Frank Petrie

0 Comments